
Begin with the space the image needs to fill
An article image displayed at 800 pixels wide may not need a 4,000-pixel source. Decide the intended display width and whether you need extra pixels for a high-density screen. Keep the original so you can produce a larger version later. Resizing and changing the encoding are separate decisions: fewer pixels reduce dimensions, while a quality setting changes how JPEG or WebP represents those pixels.
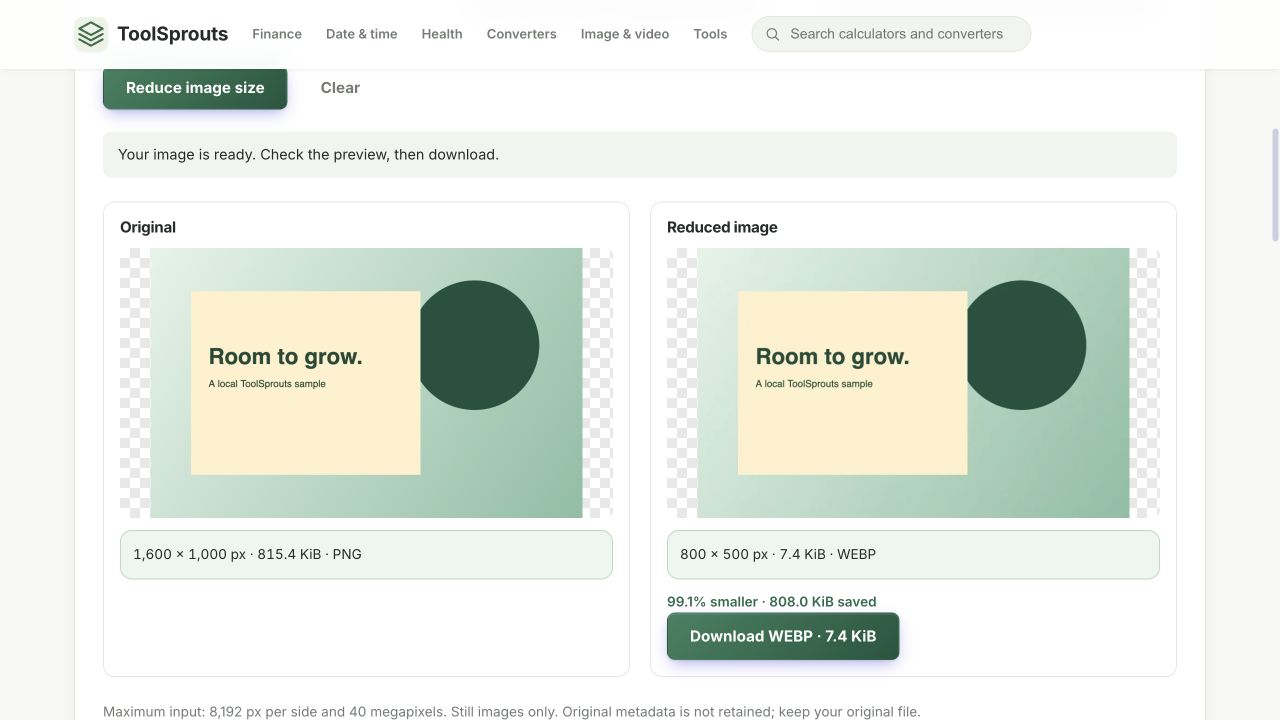
For a controlled comparison, use the built-in ToolSprouts graphic. Its flat shapes, text, and gradient differ from a detailed photograph, so its savings should not be used to predict photo compression.
Repeat our three-format comparison
- Open the Image Size Reducer and select Try an example.
- Set Maximum width or height to 800. The 1,600 × 1,000 input becomes 800 × 500 without cropping.
- Select WebP and leave quality at 80%. Select Reduce image size and record the result.
- Repeat with JPEG at 80% and a white background, then PNG. PNG disables the quality control.
- Compare the previews and download the version appropriate for your destination.
| File | Dimensions | Setting | Measured size |
|---|---|---|---|
| Original PNG | 1,600 × 1,000 | Built-in sample | 815.4 KiB |
| WebP output | 800 × 500 | 80% | 7.4 KiB |
| JPEG output | 800 × 500 | 80%, white background | 14.0 KiB |
| PNG output | 800 × 500 | Lossless pixel encoding | 141.8 KiB |
These are rounded sizes from the actual generated output. Browser encoders and fonts can change the sample and its output sizes. The previews decoded during this check; these figures are not a universal format benchmark.
Decide whether the smaller result is usable
Inspect the lettering, the circular edge, and the smooth background gradient. For your own image, check the details its purpose depends on: small screenshot text, product texture, or a face. A lower byte count is useful only if the result still communicates what the page needs.
JPEG replaces transparency with the selected background color. WebP and PNG can preserve it. An 80% quality setting is not a promise to retain 80% of the detail or use 80% of the original bytes. If your destination rejects WebP, use an accepted format even when its result is larger.
When the result misses an upload limit
Lower the maximum dimension or JPEG/WebP quality and process again. Read the newly measured output size rather than the previous result. The tool does not offer an exact target-size mode; an already optimized image can become larger. Keep the original when another export does not help.
KiB means 1,024 bytes, while a destination may show decimal KB. This tool accepts still PNG, JPEG, and WebP images up to 50 MiB, 8,192 pixels per side, and 40 megapixels. It does not preserve original metadata. For animated images or unsupported formats, use a tool intended for that input.
References and corrections
These examples describe the stated inputs and checks. They do not establish compatibility with every browser, encoder, or receiving service. Found a different result? Send a reproducible example.